Types of custom-made embroidery designs
Custom-made embroidery designs are crafted images or patterns that are usually stitched on clothing, accessories, or other fabric items. They can incorporate logos, text, or elaborate designs that are personal to someone. This is a broad area that caters to a wide variety of needs and applications. Here is a description of the various types of custom embroidery designs.
-
Logo Embroidery
For branding purposes, logo embroidery is widely used by businesses and organizations. It involves stitching a corporate logo onto uniforms, caps, bags, and promotional items. This method produces clear and long-lasting designs that enhance brand visibility and create a professional image. Each logo embroidery design is unique and can be adapted to fit different items and requirements.
-
Text Embroidery
Text embroidery involves stitching names, initials, quotes, or messages on a fabric item. Custom text embroidery is popular for personalizing clothing and accessories, making them unique and special. It is also widely used for memorial and commemorative purposes. These designs can be customized in different fonts, sizes, and styles. Thus, they can fit the specific requirements of a project.
-
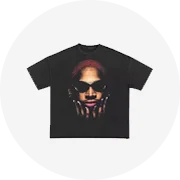
Image Embroidery
This involves stitching detailed pictures or patterns onto fabric. Popular for creating intricate designs, image embroidery is ideal for artwork, logos, and decorative patterns. It can be used on clothing, home decor, and accessories. Image embroidery requires advanced techniques and equipment to ensure high-quality, detailed stitching that captures the essence of the original design.
-
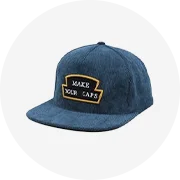
Patch Embroidery
Patch embroidery creates embroidered patches that can be sewn or ironed onto garments and accessories. These patches are popular for adding flair to jackets, bags, and hats. They can be made in various shapes, sizes, and designs. Custom patch embroidery offers a versatile way to create removable, reusable, and easy-to-apply embroidered designs.
-
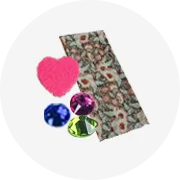
Appliqué Embroidery
This technique involves stitching a piece of fabric onto another to create a design. Often combined with embroidery, appliqué adds texture and dimension to embroidered designs. It is popular for creating patterns, shapes, and images on clothing, quilts, and home decor items. Appliqué embroidery allows for the use of different fabrics, colors, and textures to create unique and eye-catching designs.
-
3D Puff Embroidery
This technique creates raised, three-dimensional designs on fabric. Often used for logos and text, 3D puff embroidery adds depth and dimension to embroidered designs. It is popular for creating bold, eye-catching designs on caps, jackets, and promotional items. The puff effect is achieved by using foam under the stitches, resulting in a distinctive and visually appealing texture.
-
FSL Embroidery
FSL, or Freestanding Lace, embroidery creates intricate lace designs that can stand alone without being attached to a fabric. Often used for creating lace motifs, doilies, and decorations, FSL embroidery requires careful stitching to ensure the design holds its shape. It is popular for creating delicate, detailed lace designs that add elegance and sophistication to any project.
Design of custom-made embroidery
Designing custom-made embroidery involves several key steps to ensure a personalized and high-quality result. Here are the essential elements of the design process:
-
Concept and Inspiration
The first step in custom-made embroidery design is developing a clear concept. This can be based on personal preferences, brand identity, or specific themes. Look for inspiration from various sources such as nature, art, culture, or existing embroidery patterns. Consider the message or feeling that the design should convey. Whether it's a logo, quote, or intricate pattern, having a solid concept will guide the entire design process.
-
Choosing the Elements
Next, select the key elements that will be part of the embroidery design. This includes the main motif, text, and any additional decorative elements. The main motif could be anything from flowers and animals to geometric shapes or abstract patterns. If the design includes text, choose a font style that complements the overall theme and is readable at the desired size. Additional elements like borders, shapes, or icons can enhance the design and add depth.
-
Color Palette
Colors play a crucial role in embroidery design. They can significantly impact the overall look and feel of the finished piece. When selecting a color palette, consider the mood and message you want to convey. Different colors evoke different emotions and associations. For example, blue can represent calmness and trust, while red can signify passion and energy. If the embroidery is for branding purposes, ensure that the colors align with your brand's color scheme.
-
Layout and Composition
Once the key elements are defined, it's time to arrange them into a cohesive layout. Consider the balance, proportion, and hierarchy of each element. Ensure that the design flows well and that no single element overwhelms the others. Use sketches or digital design software to experiment with different compositions until you find one that feels right. Remember to consider the dimensions and shape of the fabric where the embroidery will be placed.
-
Digitization
After finalizing the design layout, the next step is digitization. This process involves converting the design into a format that embroidery machines can understand. Specialized software is used to map out the stitching path, assign stitch types, and set parameters like stitch density and tension. The digitized file is usually saved in a specific format compatible with the embroidery machine being used.
-
Testing and Refinement
Before proceeding with the final embroidery, it's essential to test the digitized design on a sample fabric. This helps identify any issues with the stitching pattern or design elements. Make necessary adjustments and refinements based on the test results. This step ensures that the final embroidery will turn out as expected and minimizes the risk of errors or complications.
-
Execution
Once the design has been tested and refined, it's ready for execution. Load the digitized file into the embroidery machine and prepare the fabric according to the machine's instructions. Monitor the stitching process to ensure everything runs smoothly. After the embroidery is complete, make any final touches or adjustments before removing the fabric and finishing the piece.
Wearing/Matching suggestions of custom-made embroidery designs
Embroidered creations are a great way to express individuality and style. It can be a bit tricky, though, to find the right balance between the embroidered piece and the rest of the outfit. Here are some suggestions for wearing and matching custom embroidery designs:
-
Mixing Patterns
When mixing patterns, consider the scale and style of the embroidery design. If the embroidery is bold and large-scale, pair it with a smaller-scale pattern, like a subtle stripe or polka dot, to balance the visual interest. Conversely, if the embroidery is delicate and intricate, match it with a larger-scale pattern to create a harmonious contrast. Keep the colors complementary to maintain a cohesive look.
-
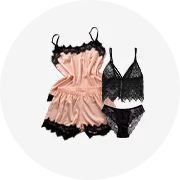
Pairing with Solid Colors
Embroidered designs typically pop on solid-colored backgrounds, so pairing them with solid-colored garments is an excellent way to let the embroidery shine. Choose colors that complement the embroidery hues to create a balanced and visually appealing ensemble. For instance, if the embroidery features warm tones like red or orange, pair it with a solid top or bottom in a neutral color like beige or cream.
-
Layering with Outerwear
When layering embroidered clothing with outerwear, opt for jackets or cardigans in solid colors or subtle patterns. This approach ensures that the outer layer does not overpower the beauty of the embroidery. Neutral tones like black, navy, or gray work well as they complement most embroidered designs. Additionally, choose outerwear with a structured silhouette to provide a polished contrast to the softness of the embroidery.
-
Accessorizing
Embroidered clothing should be paired with accessories that enhance rather than compete with the embroidery. Consider adding a statement necklace or earrings in solid colors that echo the embroidery's hues. Scarves, hats, and bags in complementary colors can also elevate the overall look. If the embroidery is particularly vibrant, keep accessories minimal to allow the embroidery to take center stage.
-
Footwear
Choosing the right footwear to complement embroidered clothing can elevate the entire outfit. Opt for shoes in neutral tones like black, beige, or brown to create a balanced look. Sandals, ballet flats, or ankle boots in these colors seamlessly blend with embroidered pieces, allowing the embroidery to remain the focal point. For a more adventurous style, consider pairing embroidered garments with metallic or jeweled-toned shoes that echo the colors in the embroidery.
Q&A
Q1: What file formats are needed for custom embroidery design?
A1: The required file formats vary depending on the embroidery machine and software being used. However, commonly accepted formats include DST (Tajima), PES (Bernina), and EMB (Wilcom). It’s important to check with the embroidery service provider or machine manufacturer for their preferred formats.
Q2: How does one ensure the custom embroidery design looks good on different fabrics?
A2: To ensure a design looks good on various fabrics, consider factors such as the stitch type, density, and complexity. Some designs may need to be adjusted for lighter or more delicate fabrics to prevent distortion or damage. Testing the design on a fabric swatch is also recommended.
Q3: How can colors be specified in a custom embroidery design?
A3: Colors can be specified using Pantone color codes, thread brand names, or by providing a physical color sample. It’s important to communicate color preferences clearly to the embroidery digitizer to ensure the final product matches the desired colors.
Q4: What is the turnaround time for creating a custom embroidery design?
A4: Turnaround time can vary depending on the complexity of the design and the workload of the embroidery service provider. Generally, it can take anywhere from a few days to a couple of weeks. It’s best to inquire about specific timelines before placing an order.


 浙公网安备 33010002000092号
 浙B2-20120091-4